

One-click setup
CC Switch
Use CC Switch to set up NoviaHub for Claude Code, Codex and Gemini CLI in one click, or add NoviaHub to CC Switch by hand.
CC Switch is a free, open-source desktop app. Its official description: switch API providers in one click and manage MCP, Skills and prompts in one place, with no more hand-editing of JSON / TOML / YAML config files. It manages settings for Claude Code, Claude Desktop, Codex, Gemini CLI, Grok Build, OpenCode, OpenClaw, Hermes, Pi and more.
For NoviaHub users, the most useful part is this: one click on NoviaHub’s API Keys page fills your key and the API address into Claude Code, Codex or Gemini CLI, with no config files to edit.
Prerequisites
Section titled “Prerequisites”- A NoviaHub account with an API key; see API Keys.
- Some balance on the account; see Wallet and top-ups.
- The tool you want to configure is installed (for example Claude Code or Codex).
Install CC Switch
Section titled “Install CC Switch”The project recommends downloading only from ccswitch.io, GitHub Releases or the source repository.
Requires macOS 12 or later. Homebrew is the recommended way:
brew install --cask cc-switchYou can also download the universal .dmg or .zip from GitHub Releases.
Requires Windows 10 or later. From GitHub Releases, download:
CC-Switch-v{version}-Windows.msi(x64 machines)- the installer whose name ends in
-arm64.msi(ARM64 machines) - or the portable
.zip, which needs no installation
Requires glibc 2.35+ and WebKitGTK 4.1. Download the package for your system from GitHub Releases:
# Debian / Ubuntusudo dpkg -i CC-Switch-v{version}-Linux-*.deb
# Fedora / RHELsudo dnf install ./CC-Switch-v{version}-Linux-*.rpm
# Arch Linux (AUR)paru -S cc-switch-bin
An .AppImage is also available.
Open CC Switch once after installing it. The ccswitch:// link protocol used by one-click import is registered during installation; the feature exists since CC Switch 3.7.0, so make sure your version is 3.7.0 or later.
Method 1: import from NoviaHub in one click (recommended)
Section titled “Method 1: import from NoviaHub in one click (recommended)”One-click import currently supports Claude Code (shown as Claude), Codex and Gemini CLI (shown as Gemini).
-
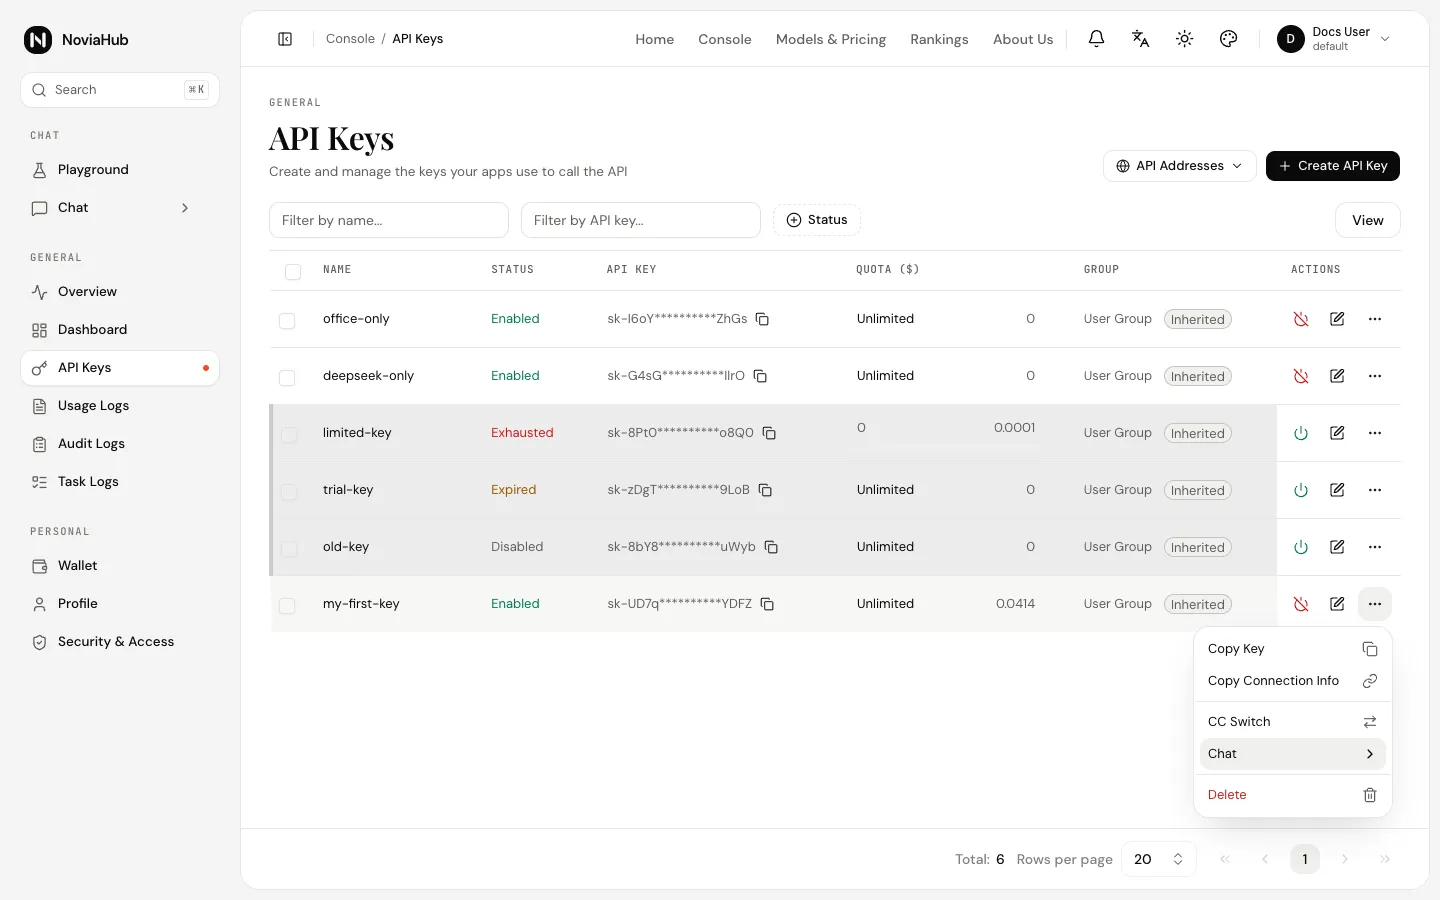
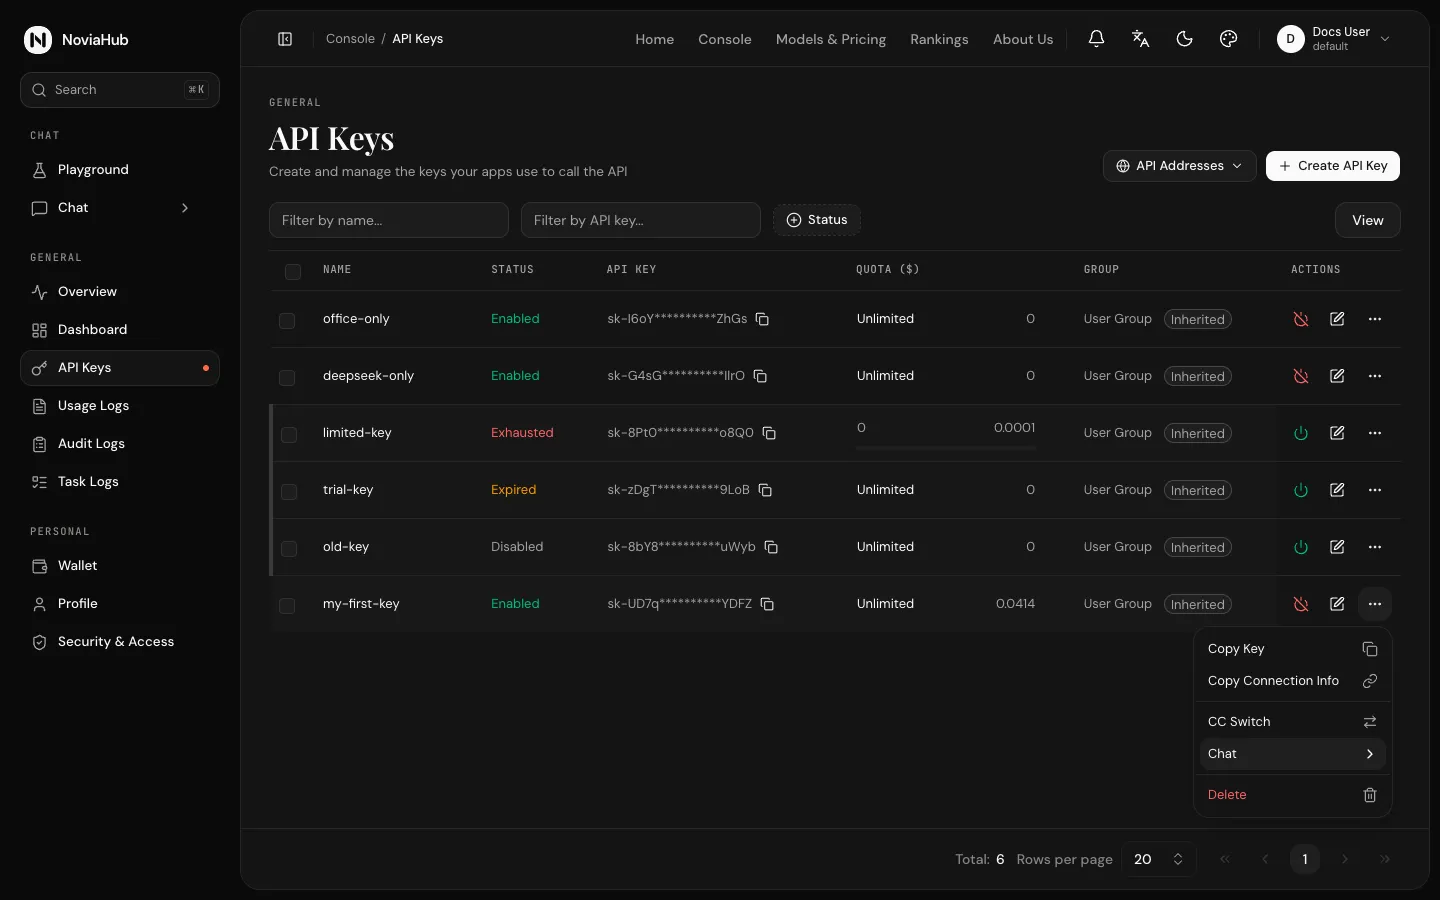
Sign in to NoviaHub and open API Keys in the console.
-
Find the key you want to use, click ⋯ (Open menu) at the end of its row, and choose CC Switch.
-
In the Import to CC Switch window, fill in:
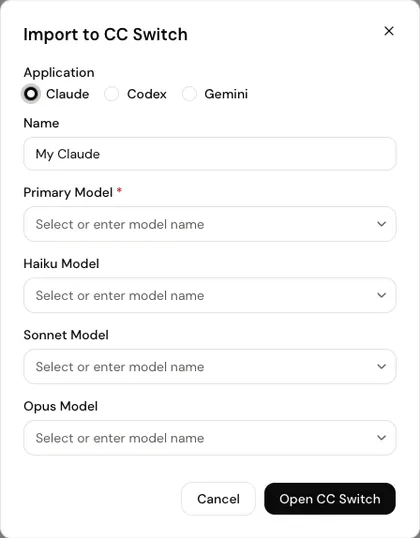
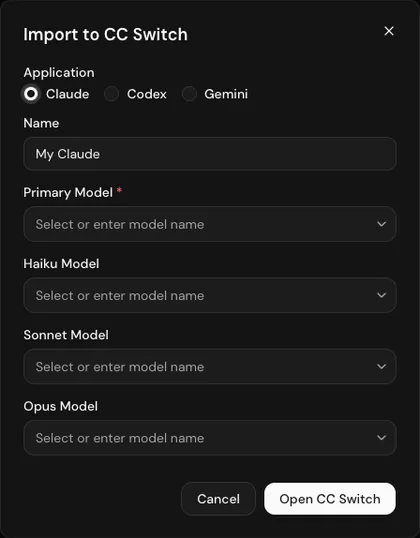
Field What it means Application The tool to configure: Claude(Claude Code),CodexorGemini(Gemini CLI).Name How this entry is named in CC Switch. Defaults to My Claude/My Codex/My Gemini; you can change it.Primary Model Required. The list shows the models your account can use; you can also type a model ID. Haiku Model / Sonnet Model / Opus Model Only shown for Claude, and optional. Claude Code uses these three tiers in different situations; here you choose which NoviaHub model each tier maps to. Make sure the primary model supports the right protocol (check the endpoint labels in the model details under Models & Pricing):
- Claude: a model with the
Anthropiclabel, for exampleclaude-sonnet-5; - Codex: a model with the
Responselabel, for examplegpt-6-sol; - Gemini: a model with the
Geminilabel, for examplegemini-3-flash.
- Claude: a model with the
-
Click Open CC Switch. If your browser asks whether to open CC Switch, allow it.
-
CC Switch shows an import confirmation. After you confirm, the entry is added and enabled right away.
What the import writes
Section titled “What the import writes”The import link that NoviaHub builds contains the API address, your API key, the models you chose and enabled=true (enable after import). CC Switch turns them into the tool’s settings:
| Application | API address | Main settings CC Switch writes |
|---|---|---|
| Claude | https://noviahub.com |
ANTHROPIC_BASE_URL, ANTHROPIC_AUTH_TOKEN (your key), ANTHROPIC_MODEL (the primary model), and whichever of ANTHROPIC_DEFAULT_HAIKU_MODEL / ANTHROPIC_DEFAULT_SONNET_MODEL / ANTHROPIC_DEFAULT_OPUS_MODEL you filled in |
| Codex | https://noviahub.com/v1 (NoviaHub adds the /v1 for you) |
A custom provider with base_url set to that address, wire_api = "responses", and the primary model |
| Gemini | https://noviahub.com |
GOOGLE_GEMINI_BASE_URL, GEMINI_API_KEY (your key), GEMINI_MODEL (the primary model) |
Method 2: add NoviaHub in CC Switch by hand
Section titled “Method 2: add NoviaHub in CC Switch by hand”To configure a tool that one-click import doesn’t cover, or to control every value yourself:
-
Open CC Switch and choose the tool at the top.
-
Click the + button in the top-right. On the App-specific Provider tab, set Preset to Custom.
-
Enter a name and the API Key (your NoviaHub key), and the API address for the tool:
- Claude Code, Gemini CLI:
https://noviahub.com - Codex:
https://noviahub.com/v1
Fetch Models loads the model list from NoviaHub (it calls
/v1/models; NoviaHub only returns the models your key can use). - Claude Code, Gemini CLI:
-
Click Add, then switch to this entry in the list.
Verify
Section titled “Verify”- Hover over a provider card and click Connectivity check to test the network path. The documentation says this check does not send a real model request and does not verify the API key or model name.
- The real test: open the configured tool (for example, run
claudein a terminal), send a short message, check that you get a reply, then look for the call under Usage Logs in the NoviaHub console.
- Claude Desktop cannot be imported in one click: CC Switch’s import link protocol has no Claude Desktop app. CC Switch has a separate Claude Desktop panel; its documentation says direct mode needs model IDs shaped like
claude-sonnet-*/claude-opus-*/claude-haiku-*, and that you must fully quit and reopen Claude Desktop after switching. You can also skip CC Switch and follow the Claude Desktop page. - Changing the model: edit the entry in CC Switch, or import again from NoviaHub with the new model.
References
Section titled “References”Checked on 2026-09-28:
- CC Switch repository and description: https://github.com/farion1231/cc-switch
- Installation: https://github.com/farion1231/cc-switch/blob/main/docs/user-manual/en/1-getting-started/1.2-installation.md
- Adding a provider: https://github.com/farion1231/cc-switch/blob/main/docs/user-manual/en/2-providers/2.1-add.md
- Connectivity check: https://github.com/farion1231/cc-switch/blob/main/docs/user-manual/en/4-proxy/4.5-model-test.md
- Import links (deep links): https://github.com/farion1231/cc-switch/blob/main/docs/user-manual/en/5-faq/5.3-deeplink.md
- Claude Desktop panel: https://github.com/farion1231/cc-switch/blob/main/docs/user-manual/en/2-providers/2.6-claude-desktop.md
- Changelog (3.7.0 introduced
ccswitch://): https://github.com/farion1231/cc-switch/blob/main/CHANGELOG.md